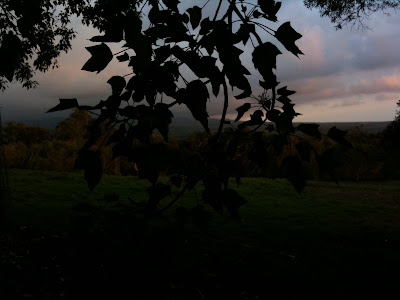
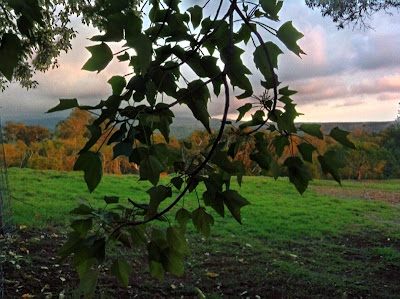
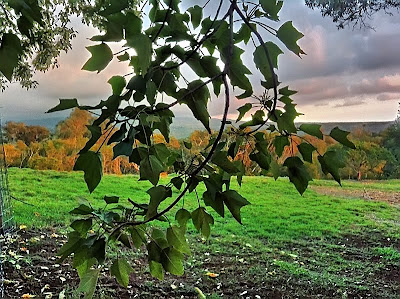
Digital Diva here. Wishing us all music, memories, and iPhoneography of every kind - have a great New Year's eve and an artistic 2010.
(Apps used were Photogene to tweak photos for color and exposure, DXP to create multiple exposures, and Pic Grunger to put the cracks in the cherub photo.)
Wednesday, December 30, 2009
Monday, December 21, 2009
Go Antiquing With Your iPhone
Digital Diva here. I love going antiquing with my iPhone. No, I'm not talking about buying furniture here. I love creating an "aged" look to my photos. Fotomuse is a terrific app for this process with it's rough borders and layers.
This first photo I took last week of giant ferns up in the Kamakou rain forest here on Moloka`i. I brought the straight shot into FotoMuse and selected this border and layer with tint to age it.
I shot this tree out at Papohaku Beach on the West end of Moloka`i where the Dude and I had gone to shoot the big waves. The waves were HUGE but they were closing out into total whitewater, so we didn't get many great wave shots after all. Still as long as we have our iPhones we are never at a photographic loss. I turned the tree into a faux infrared with the Camera Bag app. I then used the same border/layer combo in FotoMuse as I used for the ferns. I love the shot and also plan to use it in a future double exposure - its such a great "set waiting to happen" shot.
This photo of a large anthurium blossom with curving ferns I turned into a pencil sketch in Ezimba. I double exposed it with the DXP app with a washed outt photo of ferns in this post. The ferns were actually red and green in color, so the overexposed photo gives some pink and pale green tones. I then brought it into FotoMuse and selected the border. How old can you go???????
Friday, December 18, 2009
Holy HDR, Batman! Redux
When I wrote the first "Holy HDR" article below, I, the Dude, said I hadn't tried the TrueHDR app anywhere except my front yard. We'll this afternoon I rectified that at the overlook to Kalaupapa. This result is a 2 shot pano. Each of the images in the pano was made with 2 images (over and under exposed) that I processed using TrueHDR. Enjoy!
(click on the image to see it larger)
Wednesday, December 16, 2009
Holy HDR, Batman!
Digital Dude here. Just found one of the coolest apps ever. TrueHDR. It's Photomatix for the iPhone and it is destined to help us all make some exceptional photos. I only downloaded it last night so I haven't been able to use it anywhere except my front yard but I had to share the results. Here's what you do ---
Take one photo where you touch and focus on a darker area in the composition. The camera in the iPhone will expose for that area and the result will be a shot where the shadow are properly exposed and the highlights burned out. Here's such a shot -
Take a second photo and touch on a lighter area of the composition. Here the highlights will be properly exposed and shadow will be blocked up. Yes, here is that shot -
Now open TrueHDR and choose both these photos from your Camera Roll. TrueHDR will now align the two photos, blend them into an HDR image, and then Tone Map them to give you a resulting image with expanded dynamic range where both the shadows and highlights are properly exposed! Here it is -
If you want to take it one step further. Open this image in IFlashReady and reflash it with "HighFlash" which is actually another faux HDR process. Give it some noise reduction and sharpening in PhotForge and, Oh My, look what we have!
Give it a try. I'm off to shoot more images....
{Note: Just click on any photo to see it larger.}
Monday, December 14, 2009
Border Line with Ezimba iPhone App
Digital Diva still loving the app Ezimba. Along with myriad special effects, Ezimba features a whole slew of borders - really cool frames for your pix. Using the image from last post, here are three permutations.
This one is called "Border - Raised". I like it.
This wild one is called "Random Groovy Mirror Border" and it's too much fun.
My favorite so far is the first choice in the Borders - it's called simply "Mirror Border"
This one is called "Border - Raised". I like it.
This wild one is called "Random Groovy Mirror Border" and it's too much fun.
My favorite so far is the first choice in the Borders - it's called simply "Mirror Border"
Thursday, December 10, 2009
Ezimba is My New Fave iPhone App
Digital Diva here. My new favorite iPhone app is Ezimba. It contains so many permutations to create photo art that I can't remember which ones I used where in this group of photos except they were under the category "Artistic Effects". No matter, just open up a photo and app away. One clue - when you apply an effect, save it, and then undo before applying a new effect or it will just continually layer effects. Unless that is what you want to do - there are no rules. Ever.
The first photo is straight from the iPhone with no tweaking - it's pretty good just as is.
These next three photos have Ezimba effects applied.
The first photo is straight from the iPhone with no tweaking - it's pretty good just as is.
These next three photos have Ezimba effects applied.
Tuesday, December 1, 2009
Lana`i Hawai`i - A Little Slice of Heaven
Digital Diva here. The Dude and I visited the beautiful island of Lana`i just over a week ago. (See Nov. 25 blog post for great iPhone pix video from the Dude of the fabulous Hotel Lana`i.) And as always, we were both making art in our spare moments. Right outside the hotel, looking toward Lana`i City, I shot this iPhone photo. The pathway lined with pineapple plants points to town with the Cooke Island pine trees towering above.
This photo is a record shot - the foreground is dark, shadows blocked up, just not terribly interesting. I can attest that it looked much prettier to my eye.
Luckily, iPhone apps came to the rescue. I used iFlashready three times to open the shadows.
I then ran the HDR filter in Photoforge to recover highlight detail and further open the shadows. I added Vibrance to saturate the image.
I then tried the infrared filter in the Tiffen app Photo FX. (I used Tiffen filters with my film cameras back in the old days - like an old friend showing new tricks.
Next I used PicMix to layer the infrared version on top of the super saturated color version and painted in a little color at about 25% opacity. I like this look - used to do it in Photoshop with my big girl digital camera images.
I was having such a good time, I went back to my saturate, HDR image and oversharpened it for a photorealist painting effect
I then turned it black and white in Photoforge - looks like an engraving with the oversharpening.
I kept fooling around and used Shockmypic on the saturated HDR image for a whole different look.
In Cinema Fx, I used the Egyptian Gold filter on the saturated image.
Last, I used the Color Comic filter found in CinemaFX app for a completely different take on the scene.
And then it was time for breakfast at the Canoes restaurant, where the owner, Fergie, is an iPhone aficionado of the highest order. He posts his daily specials to Twitter and Facebook right from his iPhone every am. We had a blast sharing apps, photos, and iPhone stories. This helped fuel our app - etite. So we ordered and ate the heavenly banana macadamia nut pancakes while we shared.
This photo is a record shot - the foreground is dark, shadows blocked up, just not terribly interesting. I can attest that it looked much prettier to my eye.
Luckily, iPhone apps came to the rescue. I used iFlashready three times to open the shadows.
I then ran the HDR filter in Photoforge to recover highlight detail and further open the shadows. I added Vibrance to saturate the image.
I then tried the infrared filter in the Tiffen app Photo FX. (I used Tiffen filters with my film cameras back in the old days - like an old friend showing new tricks.
Next I used PicMix to layer the infrared version on top of the super saturated color version and painted in a little color at about 25% opacity. I like this look - used to do it in Photoshop with my big girl digital camera images.
I was having such a good time, I went back to my saturate, HDR image and oversharpened it for a photorealist painting effect
I then turned it black and white in Photoforge - looks like an engraving with the oversharpening.
I kept fooling around and used Shockmypic on the saturated HDR image for a whole different look.
In Cinema Fx, I used the Egyptian Gold filter on the saturated image.
Last, I used the Color Comic filter found in CinemaFX app for a completely different take on the scene.
And then it was time for breakfast at the Canoes restaurant, where the owner, Fergie, is an iPhone aficionado of the highest order. He posts his daily specials to Twitter and Facebook right from his iPhone every am. We had a blast sharing apps, photos, and iPhone stories. This helped fuel our app - etite. So we ordered and ate the heavenly banana macadamia nut pancakes while we shared.
Wednesday, November 25, 2009
Time out of Time
Digital Dude here. Lynette and I spent the weekend at the Hotel Lanai on the island of the same name. It's a classically beautiful Hawaiian inn; low key, rustic elegance, great food, true aloha spirit. When I wasn't playing golf, I spent my time making iPhone photos in the hotel's gardens. I then uploaded my favorite images to Animoto, added some local music and created an instant homage to a wonderful weekend. Hope you enjoy it!
Tuesday, November 24, 2009
More Hawaiian iPhone Art Collage Photos
Monday, November 16, 2009
Animoto!
Hi, Digital Dude here with a fabulous new site for you to check out. It's called Animoto and it makes incredible slide shows out of your images, be they from the iPhone or your big boy cameras. Pay a small fee ($30 per year), upload your images, choose their music or upload your own. Click! And they put together a spectacular graphic slide show in sync with the audio. You can play it on the net at their site, upload it to Youtube, or download a high resolution file for making into a DVD. Click above and check it out for yourself. This is a show I made using some of my favorite iPhone images. Let me know what you think! (If you should choose to sign up for Animoto use my referral code: uextanqo and you will get $5 off)
iPhone Art Hawaiian Style
Tuesday, November 3, 2009
Lockton Loaded: iPhone Art That’s All In The Family
Yep that’s right! A whole family of iPhone artists has just shared some images with us! Check these out:
Lindsay Lockton took this wild photo by shooting subsequent photos displayed on iPhones - kind of a mirror reflected in a mirror reflected in a mirror......... How creative is that?
Her Mom, Kelly, shot this fabulous photo of cowboys and proceeded to tweak it in the following apps:
1st- Perfectly Clear to brighten up the picture, added more color vibrancy and over sharpened a bit.
2nd - PhotoForge to crop, adjusted the Vibrance again and "Posterized" it.
3rd - Photogene to frame it.
4th - ArtCamera, used the crumpled paper filter.
And dad Ron, the most recent iPhone convert in the family, “shot and shocked” this photo of Kansas City's autumnal splendor. He calls it simply “Midwest in Fall.”
The Lockton family by their own description have become official iPhone art addicts. And we’re so happy they are.
Friday, October 23, 2009
Trees at my window, window trees.
Digital Dude here. I was in Kansas City this week. Lovely fall view from my hotel. Great experience, but not much of a photo (see below). Ah, but we live in the age of the iPhone!
Brought the photo first into PhotoForge and did a little HDR on it. Then into Effects Touch and inversed part of the back ground to add color. Then into ArtistsTouch and painted it with chalk and an exacto knife. Into EdgePix for the framing, and finally into Photogene for the caption. There you have it! As I seem to say far too often on this blog -- 2 much fun!
From this...
To this...
Thursday, October 22, 2009
Vivid Southwest iPhone Photo Art Pix
Sunday, October 18, 2009
Pastel Photo Painting On The iPhone
Hi photo pals - Diva here. As the Dude said, we rode our lil phones hard and put them up wet while in Phoenix, so get ready to see more Southwest images. I've always loved the pastel tones in that region from pale sage to aqua to sandstone pink. In celebration, I created these three collages (along with literally HUNDREDS more). I used DXP, Brushes, and Collage as the apps. All the photos were taken and processed on the iPhone.
Tuesday, October 13, 2009
The Days are Just Packed!
Dude here, speaking for both of us. The Diva and the Dude had some down time here in Phoenix after a talk I had to give. Down time, you say? Not when we have our iPhones with us! Who knows what we did to make these images?!
Mine, the one with the birds and the one with the night time trees in the background, were made on two apps new to us -- Effect Touch and PicMix. Both are excellent, allowing one to blur the transitions between layers and to paint in effects where you choose.
Diva's images (the other two) were made mostly with DXP (double exposure) and many, many layers.
Hope you enjoy looking them even half as much as we enjoyed making them!!!!!
Subscribe to:
Posts (Atom)